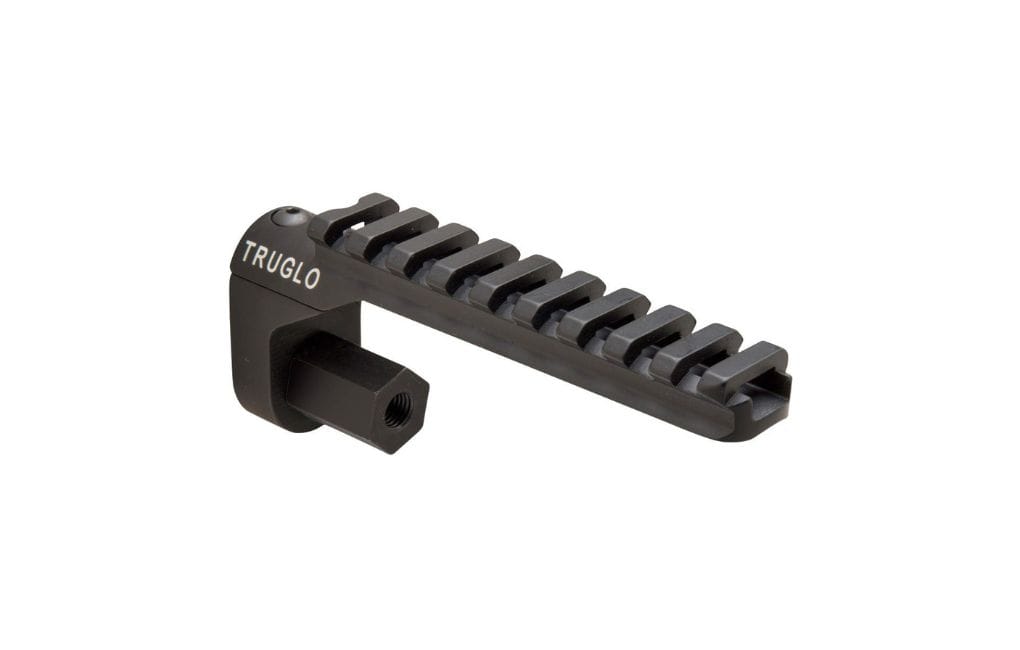
Picatinny rail mounts are one of the most common accessories for all types of firearms. They allow you to mount different types of accessories, such as scopes, lasers, and sights. However, this cannot happen until you have attached your mount, which is why proper installation is crucial for the stability and usability of your weapon.
In this guide, we will provide a comprehensive step-by-step guide and methods to ensure a flawless attachment of your Picatinny rail mount.
Preparing the Firearm for Rail Installation
Safety Check
Before commencing the installation, it is crucial to confirm that the firearm is unloaded and safe to handle.
Clean Surface
Thoroughly clean the mounting area, removing any traces of debris or obstructions that could potentially compromise the integrity of the installation.
Read More: Different Types of Picatinny Rail Mounts
Step 1: Remove Any Bases That Are Currently Mounted on the Receiver
Ensure Safety
Before delving into the installation process, it is of paramount importance to confirm that your firearm is unloaded. Remove any magazines and thoroughly inspect the chamber to ensure the gun is safe to handle.
Remove Existing Bases
Utilize the appropriate tools, such as a screwdriver or Allen wrench, to carefully and methodically unscrew and remove any existing bases or mounts that are currently attached to the receiver. This meticulous step lays the foundation for a seamless installation of the new Picatinny rail.
Step 2: Clean the Receiver and the Mounting Holes
Cleaning Tools
Gather a clean, lint-free cloth, a suitable solvent, and an array of brushes to thoroughly cleanse the receiver and the mounting holes.
Remove Debris
Ensure that all traces of dust, oil, and any other unwanted debris are meticulously removed from the surface. A pristine mounting area is essential for the new Picatinny rail to sit securely and establish a robust connection.
Step 3: Install the Mount
Position the Mount
Align the Picatinny rail with the pre-drilled mounting holes on the receiver, taking great care to ensure a proper and precise fit.
Insert Screws
Gently place the screws through the mount and into the corresponding holes on the receiver.
Tighten Screws
Initially, hand-tighten the screws, then utilize a screwdriver or a calibrated torque wrench to secure them according to the manufacturer’s specified torque requirements. This meticulous approach ensures a secure and consistent attachment.
Step 4: Install Your Rings
Choose the Rings
Select the rings that have been designed and manufactured to be compatible with your scope and the Picatinny rail. If you want your scope to always be stable and secure, it is highly recommended to choose Picatinny rings as opposed to Weaver rings.
Attach the Rings
Slide the rings onto the Picatinny rail and use the provided screws to attach them to the rail. The rings should be evenly spaced and flawlessly aligned to form a solid and robust basis for secure scope mounting.
Mount the Scope
Place the scope in the rings and slowly start tightening the top screws. Remember not to over-tighten the screws as this can cause damage to the scope lenses.
What Kind of Rings Can I Use? Weaver or Picatinny?
Both Weaver and Picatinny rings can be used with Picatinny rails. However, if you are a dedicated gun owner, you would rather go for Picatinny rings when it comes to the question of cost and compatibility.
They are designed to work with the wider Picatinny rail system and are more stable unless you need a slimmer overall profile, which is when you should consider using Weaver rings instead.
Choosing the Right Rail for Your Needs
Apart from all the parameters mentioned above, there are two more substantial ones. The first is the usage, or to be more precise, the purpose for which you are purchasing a rail in the first place.
To make the right choice, you need to know, at the very least, what accessories you plan on attaching to your rifle and what you want to do with it in general. Based on this knowledge, you should then decide on length and material.
The second one is checking the compatibility. Besides your rifle’s model, you should always pay special attention to the type of the receiver in addition to its brand and other details.
Gathering the Necessary Tools and Prioritizing Safety
Preparation Kit
To complete the installation, you may need a screwdriver, a calibrated torque wrench, Loctite, as well as a comprehensive set of cleaning supplies.
Safety Warnings
To prevent injuries or instances of accidental discharges, always perform your work on an unloaded firearm. Make sure your work area is clean and free of potential risks, ensuring that all needed tools are carefully organized and kept close at hand.
General Steps for Installing a Picatinny Rail (Rifle & Shotgun)
Align the Rail
Carefully position the Picatinny rail over the pre-drilled holes on the receiver, ensuring a precise and secure fit.
Secure with Screws
Hand-tighten the screws initially, then use a torque wrench to secure them according to the manufacturer’s recommended specifications.
Mounting Accessories on Your Picatinny Rail
Attach Accessories
Follow the manufacturer’s instructions for each accessory you wish to mount on the Picatinny rail, ensuring a proper and secure attachment.
Secure Fasteners
Utilize the appropriate tools to guarantee that the accessories are firmly and consistently attached to the rail.
Testing and Final Adjustments
Check Alignment
Meticulously inspect all mounts and accessories to ensure they are properly aligned and securely fastened.
Test Fire
Conduct a test firing to confirm that the entire setup is functioning correctly and that the Picatinny rail system is providing the desired level of stability and accuracy.
Conclusion
In this comprehensive guide, we have meticulously covered the step-by-step process of installing Picatinny rail mounts on your firearm. From the initial removal of existing bases to the mounting of accessories, we have provided detailed instructions to ensure a secure and reliable installation.
Remember to prioritize safety, utilize the appropriate tools, and conduct regular maintenance to keep your Picatinny rail system in optimal condition, enhancing the performance and versatility of your firearm.


0 Comments